Shopping Basket:
[basketSummaryTotalItemCount] item[s]
20 June 2022
We are delighted to welcome professional photographer, Stu Williamson as our guest blogger.
In this blog, Stu goes through the basics of what you need to create a stunning image of the jewellery you sell.
1. What equipment do you need to take great photographs of jewellery?
I mainly use a Canon 5ds camera and two lenses. One is a macro lens so I can photograph close-up (100 mm Sigma). The other is an 85 mm Sigma Art lens. Both are amazing lenses. The general rule is the higher the resolution camera and the better-quality lenses you have, the better the definition will be in the final edits.
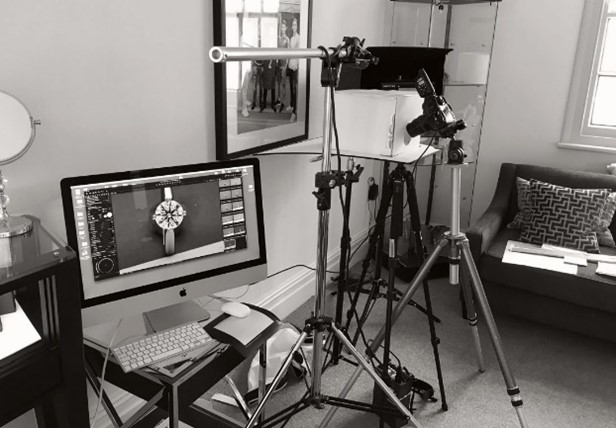
When shooting, one thing you need to think about is keeping your camera stable. I would definitely recommend you invest in a good tripod. Blurred photos are no good to anyone!
Another option when shooting jewellery seriously is to purchase an Orbitvu micro machine. They are the ultimate in lighting and shooting jewellery without the hassle of setting up softboxes and reflector cards.
2. What about lighting?
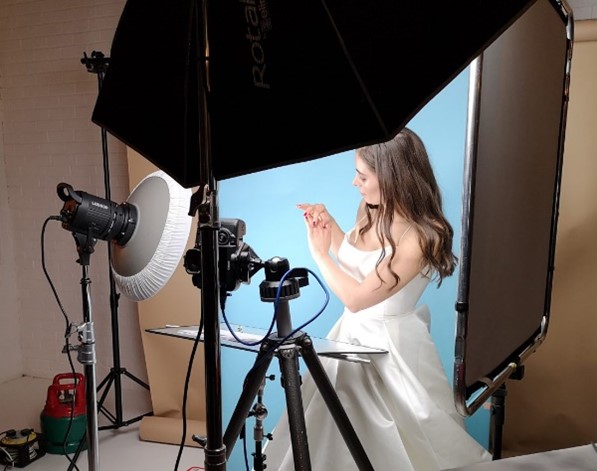
If you are not shooting with an Orbitvu, then I suggest using flash heads, or LED heads fitted with umbrellas, or medium-sized softboxes. I use Elinchrom lights.
Each light modifier will give you a different feel, so selecting the correct one is important, it’s really down to the effect you are trying to achieve, i.e., bare bulb would obviously give you shadows, and a bright, crisp feel whilst softboxes/brollies would give you a much softer effect.
I also have small A4 size white/black pieces of card on hand. These are designed to block or reflect light. Bouncing the light onto the jewellery from the reflector board will help give you a better lit photograph, especially as most jewellery has a reflective finish.
Another option for a photographer is to use available light from a window or even outdoors, although it can be unpredictable here in the UK, so getting consistent results is sometimes a struggle.
If a window is your choice, remember to set up with the window behind you. Also, if the light is too hard coming through the window, then hang an opaque white sheet in front of it, to emulate the effect of using a softbox.
I then use reflectors the same way as in a studio shoot, which bounces the light towards the Jewellery. Try not to shoot into the window light unless that's the effect you are looking for.
3. What backgrounds do you need?
Background choices are really up to the photographer and client. Think about the brand you are photographing and try and select similar colours that match their website tones.
If the images are for e-commerce, i.e., a web selling platform, then I recommend a plain white or black background. These tones work the best as then the jewellery is then shown in a clear-cut way. No frills!
For more lifestyle shots, be creative. Use wood, marble, slate, tiles, flowers, crystals, props etc., to lay the jewellery on. You can also hang jewellery on fishing line or even make your own transparent rigs. The choice is yours, so have fun!
4. How do you set up/position the jewellery?
Good composition is important, and for some people, this comes naturally, for others here are some helpful suggestions:
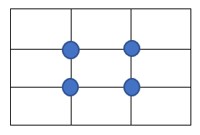
Thirds
It is suggested that you divide your image into thirds, both horizontally and vertically. Then position your jewellery in one of the intersection points (illustrated by blue dots).
Studies have found that people's eye-line is naturally drawn to these points. This simple technique can be very helpful when setting up photos on different backgrounds.
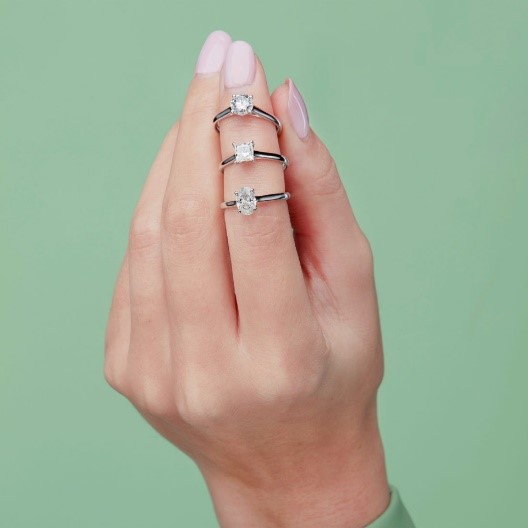
Odd numbers
Another suggestion is to frame your jewellery, i.e., put two other items of jewellery around the main item. This is known as the rule of three. Triangle shapes are also very pleasing to the eye. Stacking rings or earrings use odd numbers.
If you play with this theory, you will be surprised by what can be achieved.
Balance
If the rule of three isn't appropriate, then consider the balance within the image. Make sure there is equal detail in each half of the photograph. Unbalanced images can look disoriented.
These are guides, and there are no hard and fast rules! It's about trial and error - take your time and play with different options, compositions and setups.
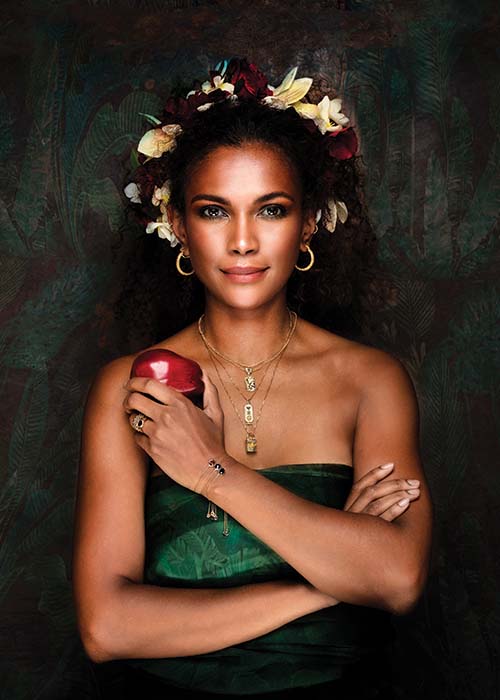
5. What do you need to consider when taking a jewellery shot using a model?
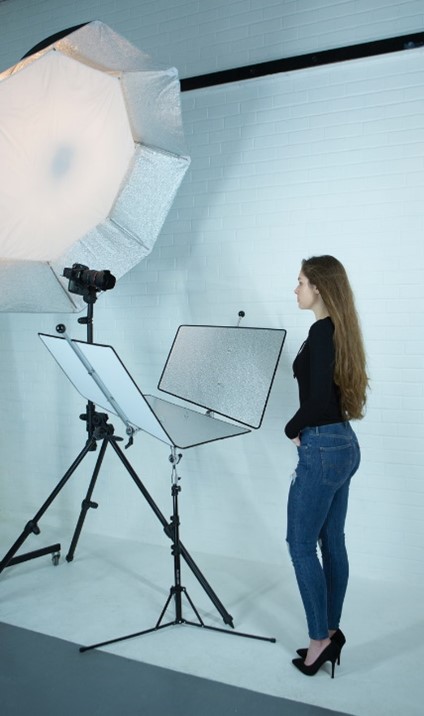
When shooting models wearing jewellery, the lighting needs to reflect the mood. This is when your lighting choice comes into its own. My preferred style of lighting is called butterfly lighting; many photographers prefer this style as it’s the most flattering. I nearly always use a Try-Flection unit too.
(Butterfly lighting is where the light is placed above and directly centered with a subject's face. This creates a shadow under the nose that resembles a butterfly.)
When photographing models, you need to bear in mind the lens's depth of field, as the model may be in focus, but the jewellery is not. I would recommend taking several shots of the model in focus and several shots with the Jewellery in focus.
Often images are your shop window on e-commerce sites, so make sure images are detailed and clear—definitely, no blurry images.
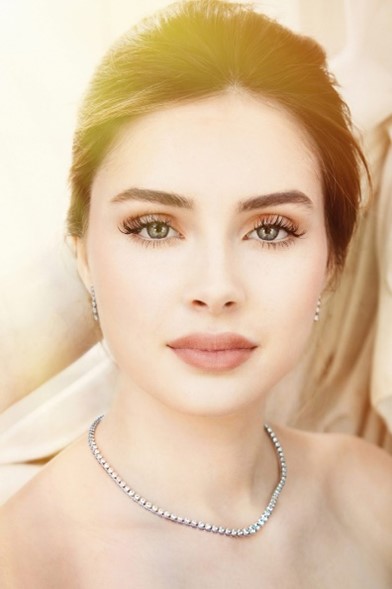
A tip with model shots is to make sure you book the best make-up artist and hairdresser that you can afford, as this has an impact on the quality of the finished image.
6. How do you retouch an image?
Retouching the images is probably the most important part of the process. Photographs need to be sharp and flawless. This is where taking multiple, focused shots helps, as you can layer the images together to get a sharp photograph.
I personally use Photoshop. It might be worth investing in a training course, or YouTube is a valuable resource for learning how to use the software.
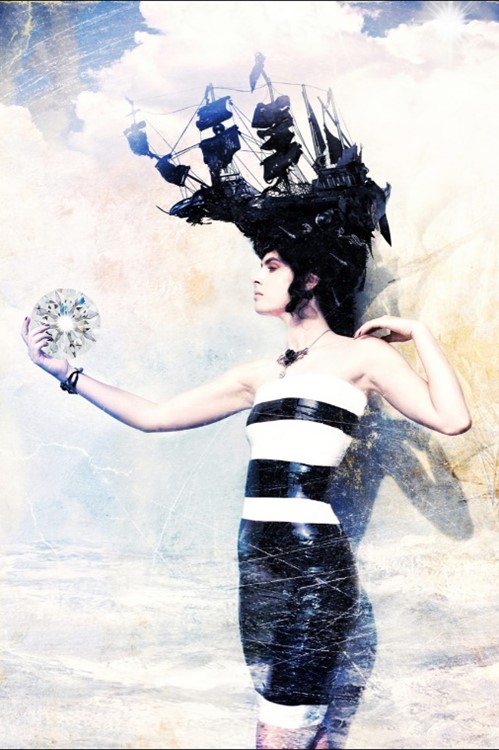
7. Do you have any top tips for creating the perfect image?
Creating the perfect image is all about vision and being able to execute it photographically. Although I plan a photo shoot, I always allow the shoot to develop and evolve. As things progress, you can get amazing images, usually beyond the original vision, by just going with the flow.
Also, keep practising! After all, practice makes perfect!
I do offer to mentor photographers, so if anyone is interested, feel free to contact me at stu@stuwilliamson.com.